Click Chart >
Audit > Audit Administration.
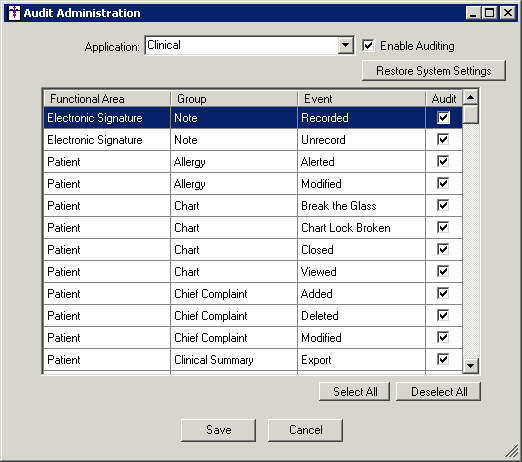
In the Application field of the Audit Administration
dialog, select Clinical.
Check the Enable
Auditing box to activate the Audit system in ChartMaker® Clinical.
Click the Restore
System Settings button to revert the Audit system back to the system
default setting (all audit options activated).
NOTE: When the Restore System Settings button is clicked, the system
will only restore the settings for the selected Application. Likewise,
you must click the Save button
to activate the restore prior to selecting a different application in
the Application field.
The areas that are available for auditing are
listed below. To activate the auditing for a particular function or event,
check the corresponding Audit
box. To deactivate auditing for a particular function or event, uncheck
the corresponding Audit box.
NOTE: You can also use the Select
All and Deselect All buttons
to select all events, or deselect all events.
When finished, click the Save
button.