Click To-Do
> Direct Messaging > Manage Direct Addresses…
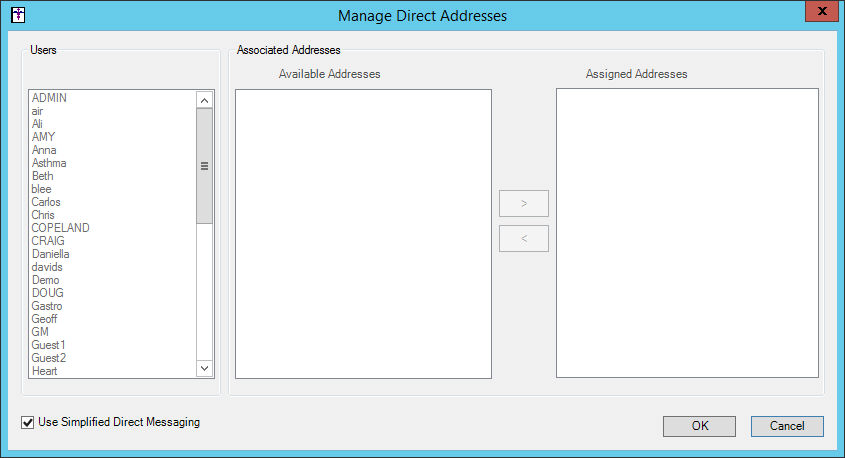
In the Manage Direct Addresses dialog, uncheck
the Use Simplified Direct Messaging
option.
NOTE: The system will default with the Use Simplified Direct Messaging
option selected, which allows all active users to send direct messages
for all valid direct message addresses for the practice. Likewise, when
this option is selected, the Users and Associated Addresses sections will
be disabled.
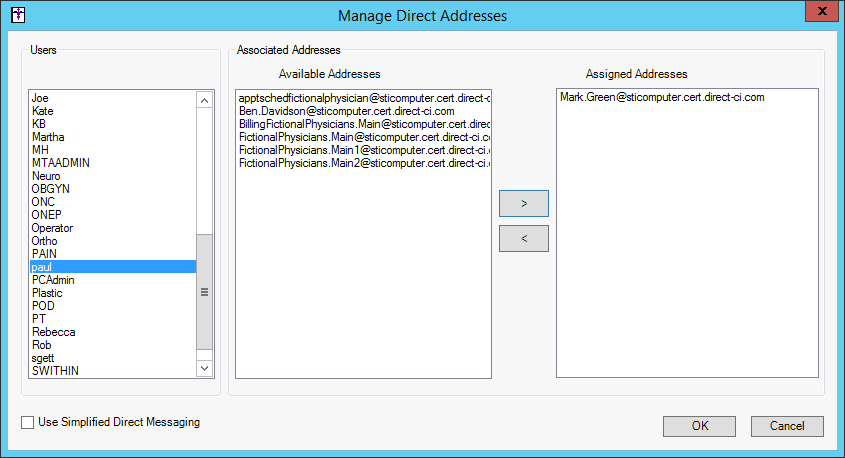
The Users and Associated Addresses sections will
become active. To assign an address for a user, highlight a user in the
Users section, select the applicable
addresses in the Available Addresses
column, and then click the >
button. The selected addresses will then appear in the Assigned Addresses
column. These are the addresses that will be available in the From
field of the New Direct Message dialog when sending and replying to direct
messages.
NOTE: When the User Simplified Direct Messaging option is inactive,
if a user is not assigned an address, they will not be allowed to send
or reply to direct messages.
Assigned Addresses can be removed for the selected user by highlighting
the applicable address, and then clicking the <
button.
Repeat step 3 for any additional users you want
to assign direct message addresses for.
When finished, click the OK
button.