Click To-Do >
Direct Messaging > Send New Message.
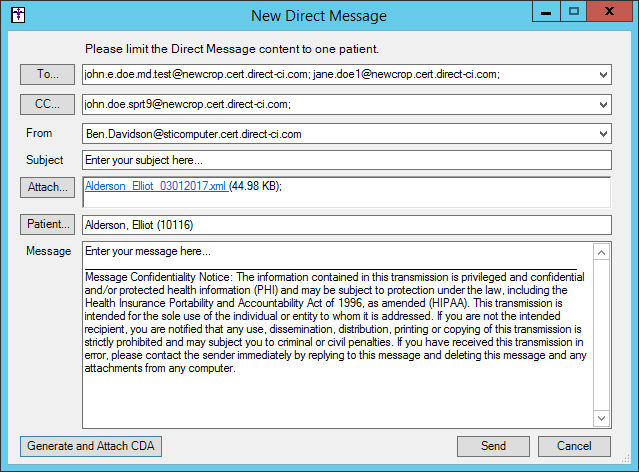
In the New Direct Message dialog, click the To button to add any recipients that
you want to send the message to, or, if you know the recipient's address,
enter it in the To field.
Likewise you can click the CC
button to add any recipients that you want to carbon copy the message
to, or if you know the recipient's address, enter it in the CC field.
The CC field functions in the same manner as the To field.
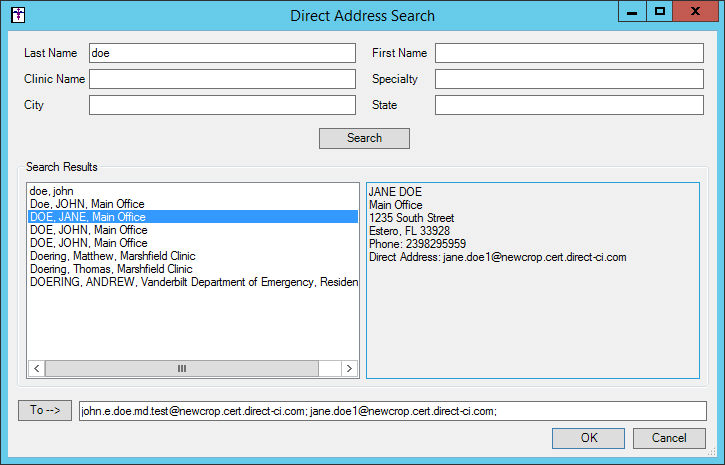
In the Direct Address Search dialog, enter any
applicable letters in the Last Name, First Name, Clinic
Name, Specialty, City, and/or State
fields to search for the recipient you want to send a direct message to,
and then click the Search button.
The Search Results section will display all recipients
that match the entered criteria above. Once the desired recipient has
been located, double-click that recipient,
and their address will appear in the To field.
Repeat steps 3 and 4 until all the desired recipients
have been added. And once the desired recipients appear in the To field,
click the OK button. Click the
Cancel button to exit the Direct
Address Search dialog without adding any recipients.
In the From field, select the Provider-
or Practice-Level Address that
you want this message to be sent from.
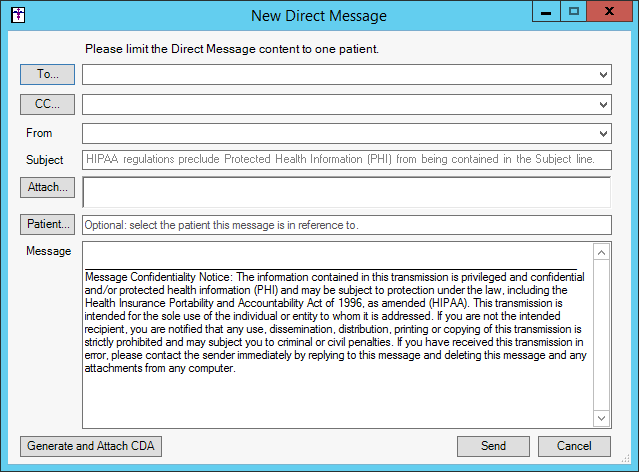
In the New Direct Message dialog, enter
the Subject, being sure not to
enter any Protected Health Information.
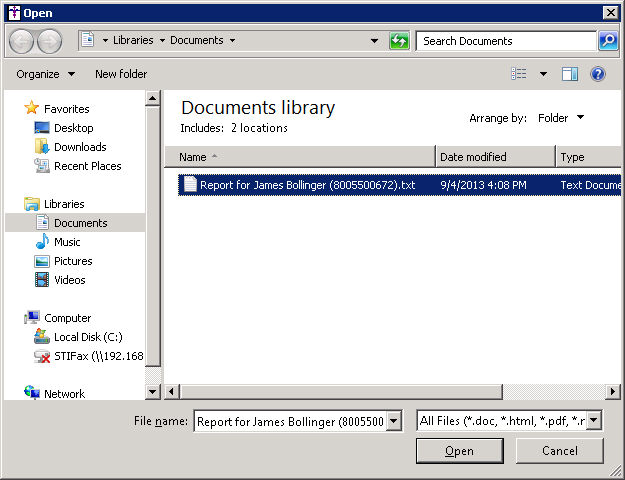
To attach a file to the message, click the Attach button.
In the Open dialog you can then browse to the
file you want to attach, highlight that file, and then click the Open button.
Click the Patient
button to attach the patient demographic information for whom this message
pertains.
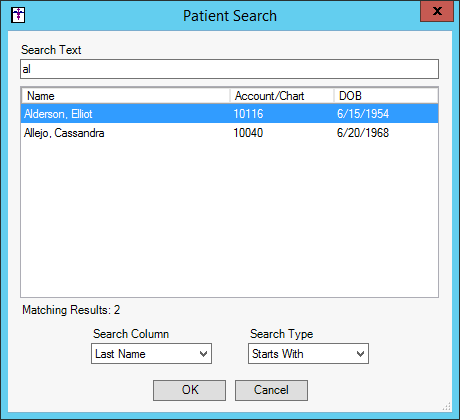
In the Patient Search dialog, modify the Search Column and Search
Type as needed, and then enter the Search
Text for the patient you want to locate. Once the patient has been
found, highlight that patient, and then click the OK
button.
To generate and attach a Transition of Care (TOC)
document, click the Generate and Attach
CDA button.
In the Patient List field of the Export Patient
Document dialog, start typing the patient's Last
Name. The list below will begin filtering patients based on the
typed text. If a patient was already attached to the message, they will
appear in the Export Patient Document dialog.
NOTE: You have ability to further filter the patient list by entering
a comma (,) in and then typing a few letters of the patient's first name.
You can also utilize the Search Column and Search Text options below if
needed.
NOTE: Patients with restricted charts will not be displayed if the
user accessing the Export Patient Document dialog does not have permission
to view that patient's chart. However, if that user has the Break the
Glass privilege, they are to export patient documents for those patient's
with restricted charts.
Once the patient is located, highlight the applicable
Patient.
In the Date Range fields, select the From
and To Date
for the TOC document.
In the Provider field, select the applicable Provider for the TOC document.
Check the Password
protect file option, if you would like to password protect the
TOC document.
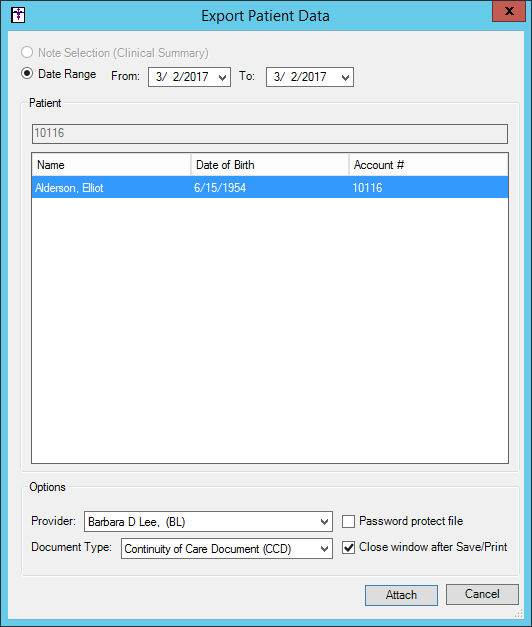
When finished, click the Attach
button.
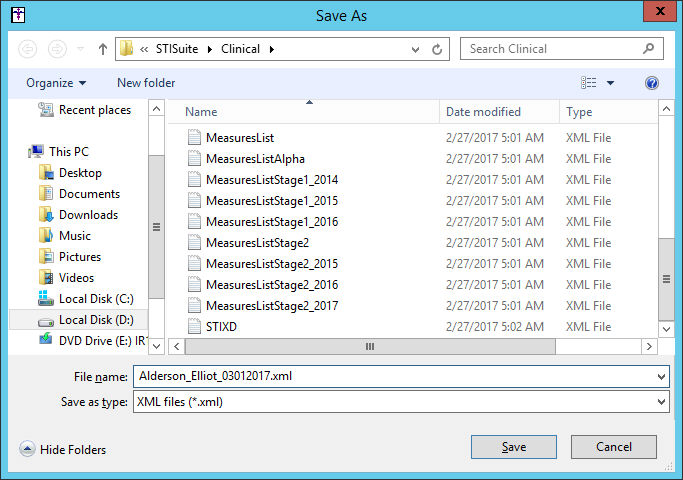
In the Save As dialog, browse to the location
you would like to save the file, modify the File name if needed, and then
click the Save button. In the
Export if Complete, click the OK
button. The attached TOC document will then appear in the Attach field.
In the New Direct Message field, enter a Message in the corresponding field.
When all of the message details have been entered
and/or selected, click the Send
button. The message will then be sent and an audit event will be tracked
in the audit trail.