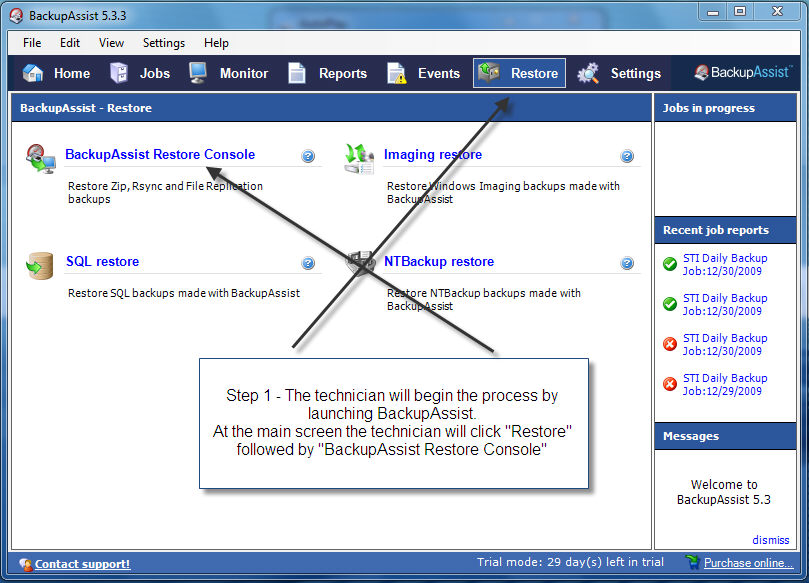
Launch BackupAssist from the desktop icon. Be
sure that the desired backup tape has been loaded into the REV drive.
Once the application has started, click Restore from the menu, and then click
BackupAssist Restore Console to
begin.
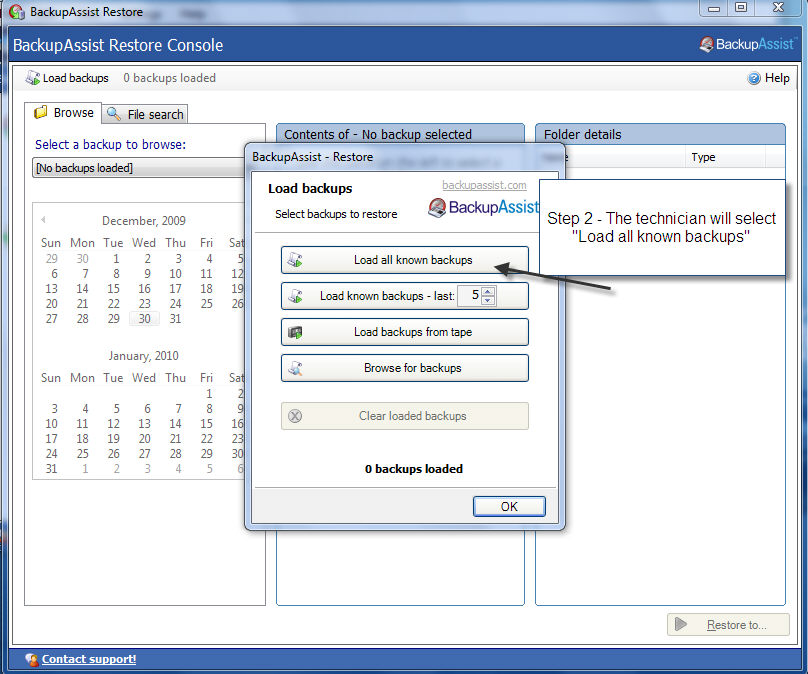
When the Restore BackupAssist Console appears
choose Load all known backups.
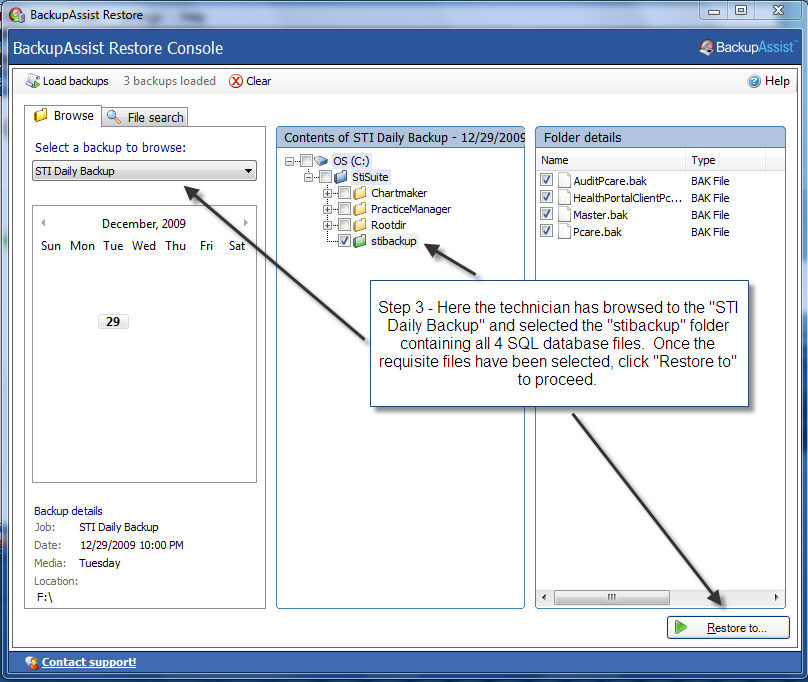
Select the directories and files you wish to restore
from the backup media. As this particular exercise involves restoring
the database files, expand the directory tree on the backup device and
select the four backup files within the right hand pane of the file explorer.
Once the request files are selected, click the Restore
to option.
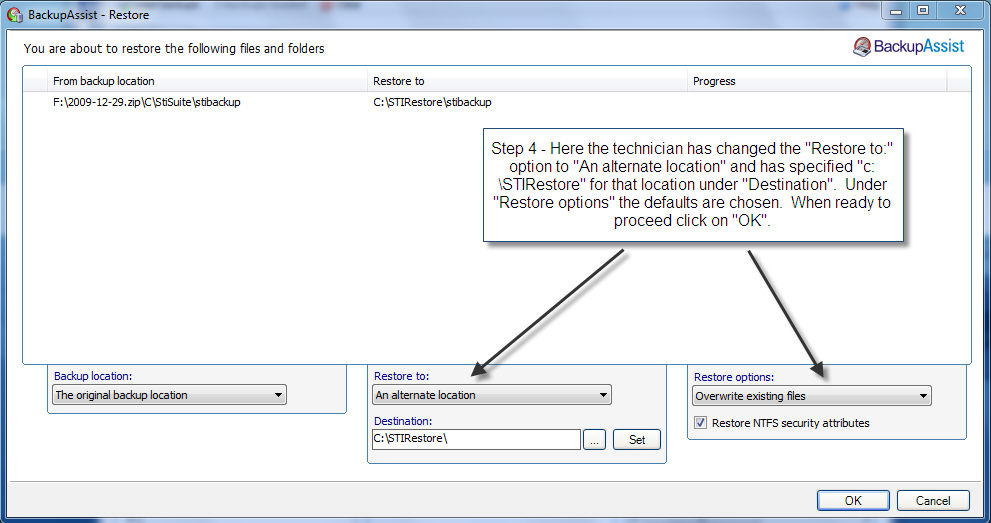
On the BackupAssist Restore screen you can change
the backup and restore locations as well as adjust restore options. In
this example, and as is the case when performed by STI technicians, the
Restore to: field has been changed to An
alternate location and the Destination field has been changed to
C:\STIRestore. The
default Restore Options is used. Click
OK to proceed.
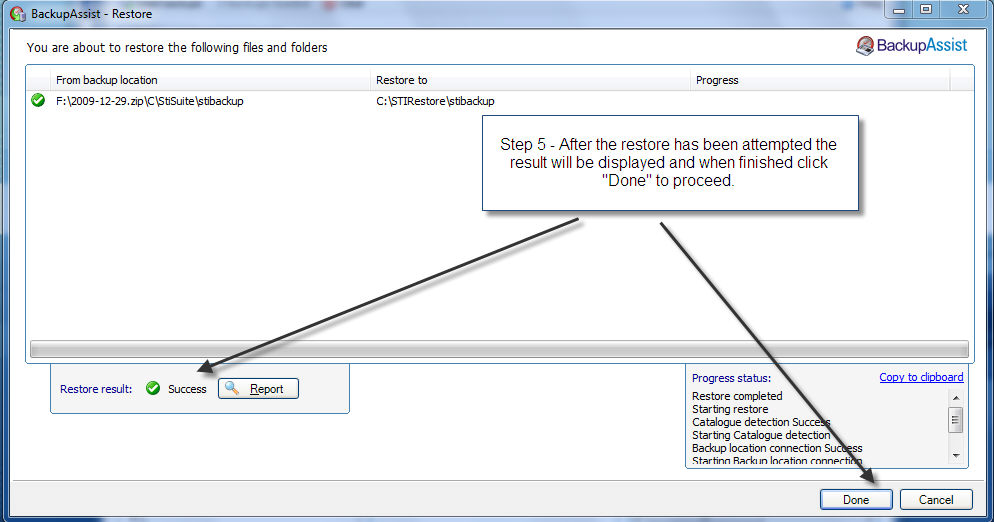
After the restore has been attempted the result
will be displayed and when finished click Done.