Click Edit >
System Tables > DSS Rule Builder.
In the Rule Builder dialog, click the Rules
tab.
In the Choose an option section, click the Modify radio button, an then select
the Rule you want to copy.
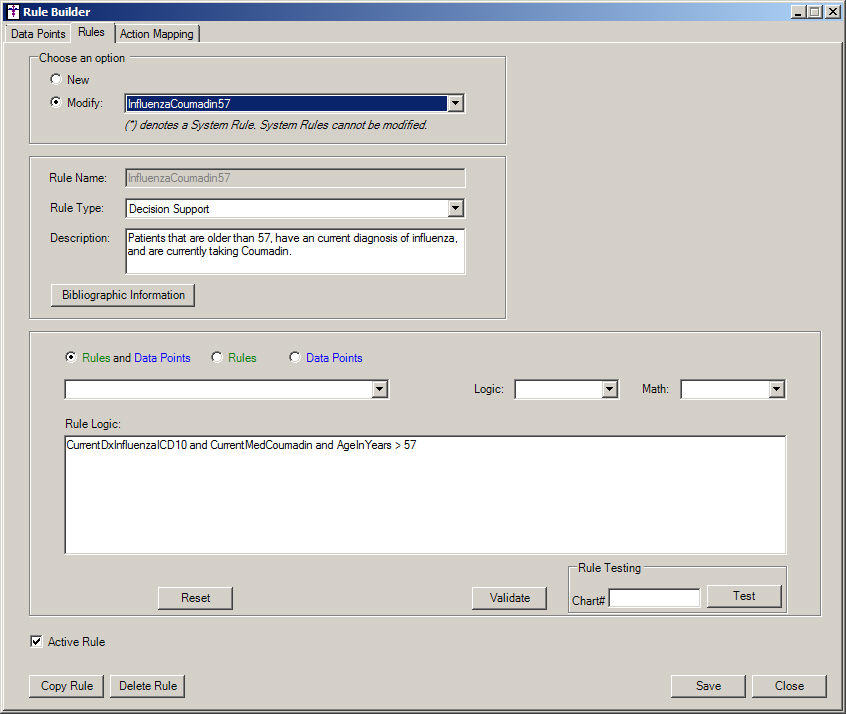
Once the applicable Rule has been selected, click
the Copy Rule button.
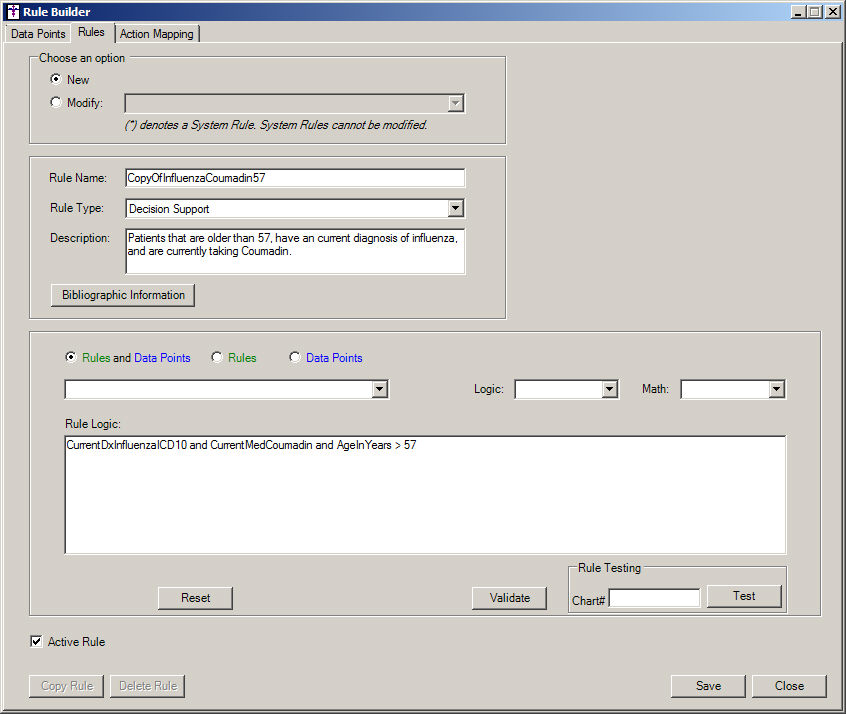
The system will then copy the rule and you will
see the Rule Name has a CopyOf
prefix. Modify the Rule Name, Rule Type, and the Description
as needed.
Enter or modify any bibliographic information
by clicking the Bibliographic Information
button, if needed.
Make any modifications to the Rule
Logic for the copied rule as needed.
NOTE: Be aware when creating and modifying rules there may be some
instances where an "=0" needs to be appended to a data point
to indicate no, not, or does not; or an "=1" for yes, is, does;
or an "=-1" for not asked. These are typically needed when configuring
rules that have results as data points, but may also be needed in instances
where the data point is not equal to a particular piece of data such as
a diagnosis, medication, or medication group. An example of the latter
would be if you are looking for patients that are not currently taking
Coumadin, the rule item would need to be indicated with a "=0",
for example, "Coumadin =0". See the Rule
Logic Examples
topic for further information on creating rules using this functionality.
NOTE: When using the DOB data
point, decision support alerts will be triggered based on how the rule
is configured. You can create rules that look for a certain range of dates
of birth. For example, a rule may read DOB
>= #01/01/1980# and DOB <= #12/31/1980#, where alerts will
be triggered for anyone born in 1980. Do note, when entering dates in
the rule, they need to have a #
symbol on either side to indicate to the system that a date is being used.
When finished modifying the rule, click the Validate button.
Once the Rule Logic has been validated, a pop-up
message will appear stating that the "Rule validated successfully."
Click the OK button.
After the rule has been validated, click the Save button to save the modifications
to the rule.
Once the copied rule has been validated and saved,
you must map the rule to a recommended action. Click the Action
Mapping tab.
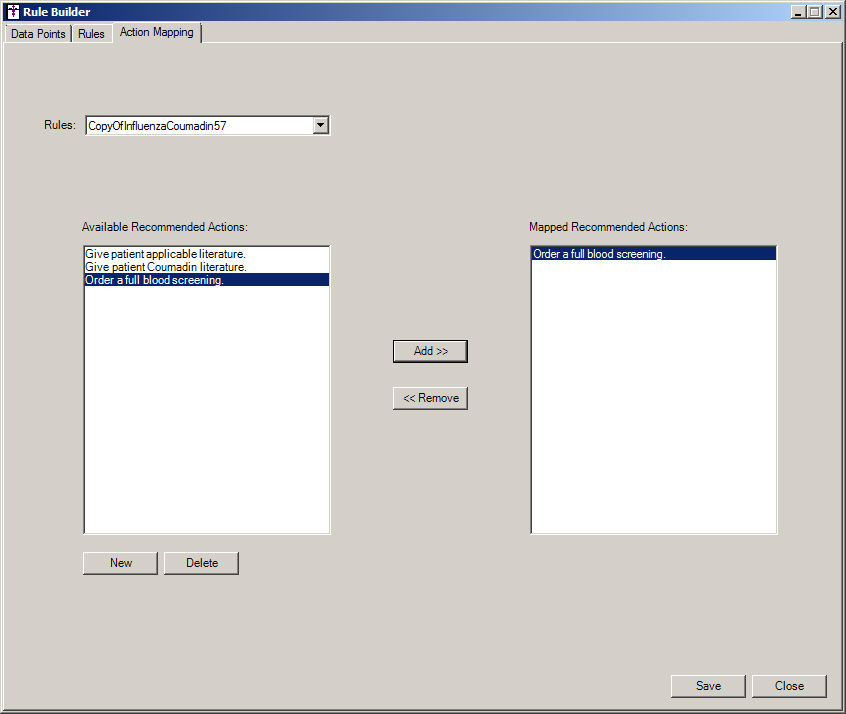
In Action Mapping tab, select the applicable Rule in the corresponding field.
In the Available Recommended Actions column, select
the Recommended Action for the
selected Rule, and then click the Add
button. The Recommended Action will appear in the Recommended
Action column of the Alert Manager whenever this decision support rule
is triggered.
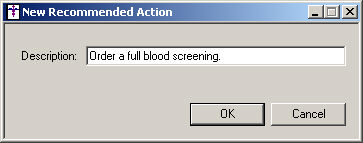
NOTE: If the Recommended Action does not appear in the Available Recommended
Actions column, click the New
button. In the New Recommended Action dialog, enter the Recommended Action
in the Description field, and then click the OK
button. For example, you could enter, "Order a full blood screening,”
and then click the OK button. The new Recommended Action will then appear
in the Available Recommended Actions list, allowing you to select that
action for the selected rule.
Once the rule has been mapped to the Decision
Support Alert action, click the Save
button, and then click the Close
button to exit the Rule Builder dialog.