Click Edit >
System Tables > Folder Management > Default Folders.
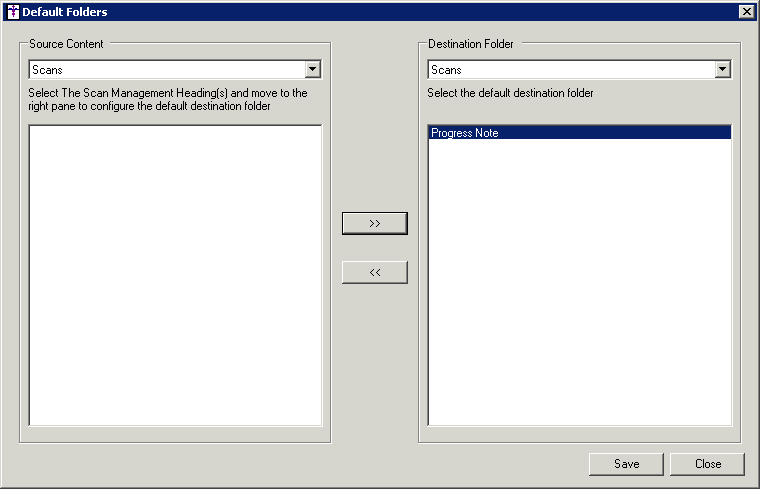
In the Source Content drop-down, select Labs, Notes,
or Scans, and the applicable template
headings (All Lab Results, Scan Management Headings, and Note Templates)
will appear.
The highlight the applicable template heading(s),
and then select the Destination Folder
you want those items to default to, and then click the >>
button.
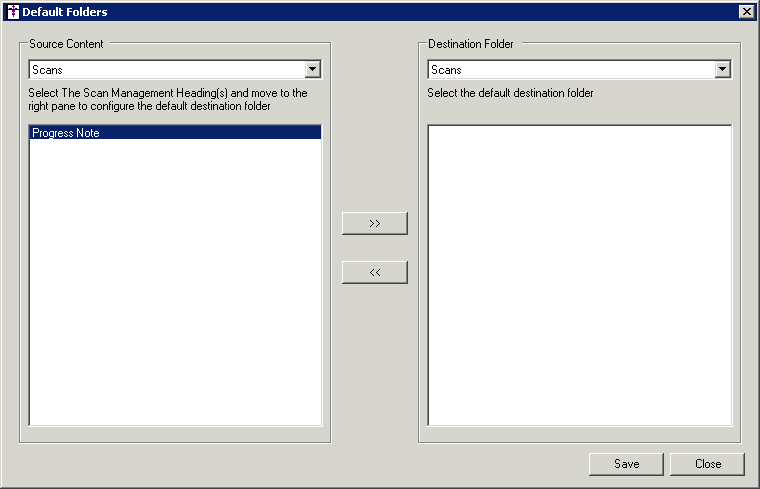
The highlighted items will then appear in the
Destination Folder column. Whenever the selected templates are used for
a patient it will default to the selected destination folder. To remove
an item from a destination folder, be sure the proper Source
Content is selected, then highlight that item in the Destination
Folder column, and then click the <<
button.
When finished, click the Save
button.
Repeat steps 2 - 5 to configure a default destination
folder for other template items.
When finished, click the Close
button.