Adds a notation to the Face Sheet
Adds a reminder to the physician’s To-Do List
Gives you the ability to print a script for this
procedure from ChartMaker®
Clinical, instead of hand-writing it.
An Order Set is a group of Labs, Tests, Imaging Procedures, Medications
and/or Referrals given to the patient at the time they are diagnosed.
For example, if you always order the same labs and give the same medications
for a specific diagnosis, then you would set up an Order Set. Order sets
will save you time completing the note since the system will automatically
selects the common procedures performed.
Sending Orders is a process that is done after a procedure has been
selected in a note. Sending orders does the following:
Adds a notation to the Face Sheet
Adds a reminder to the physician’s To-Do List
Gives you the ability to print a script for this
procedure from ChartMaker®
Clinical, instead of hand-writing it.
Orders can be configured as In-House or Off-Site. The difference between the two configurations is how you review them and whether the system creates a note or not. Note that this is only our terminology. If you prefer to set everything up as In-House because you like the system creating a note for you, then you can do so.
In House Orders:
Orders are reviewed from the Face Sheet
An auto-generated note is created once the order is reviewed
Off-Site Orders:
Orders are reviewed from the top of the chart
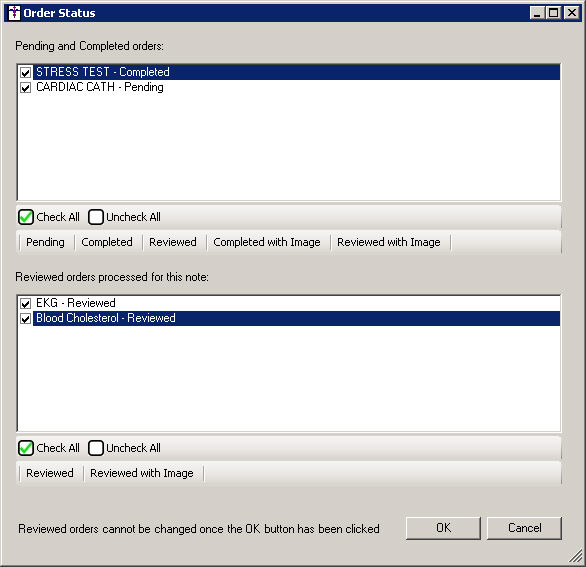
by clicking the Order Status button.

In the Pending
and Completed order section select the applicable orders you want to update,
and then click the appropriate status option (Pending,
Completed, Reviewed,
Completed with Image, or Reviewed with Image).
In the Reviewed orders processed for this note
section select the applicable procedure, and then click the appropriate
status (Reviewed or Reviewed
with Image).
No note is created (we assume if a test is done off-site, a report will be sent back to you and scanned into the chart)
Click Edit >
System Tables > Conditions > Procedures
Search for the item you plan to make a part of
an order set
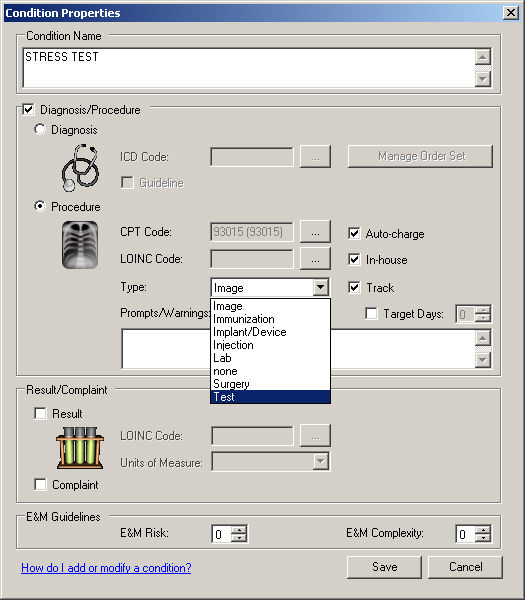
Highlight the item, and then click Properties
Check the Procedure
radio button
Select the appropriate Type
(Image, Injection, Lab, Test)
Check the Track
box
Check the In
House box if you perform the procedure in your office
Click Save
Click Close
to exit the Condition Search dialog
Click Edit >
System Tables > Order Set
In the Order Set List dialog, click the New button.
In the Order Set Template dialog, enter the Order Set Name in the corresponding
field.
Check the Global
Order Set option to allow the order to
be accessible by other users.
Click Add
next to the option you would like to attach to this order set.
NOTE: You will only see the item in this dialog if you have performed
steps 1 - 9 in the To configure a test, image, etc. section above. You
are not required to fill in all of the sections. Also, if you are performing
the test in your office, check off the In
House box. (If the test was previously configured as In House,
then the box will automatically be selected.)
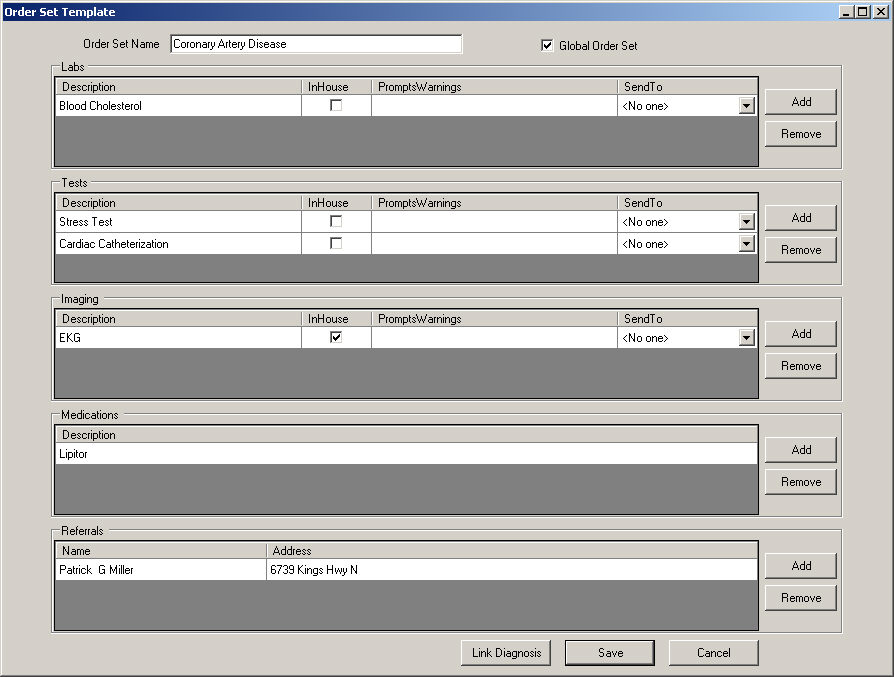
Click the Link
Diagnosis button.
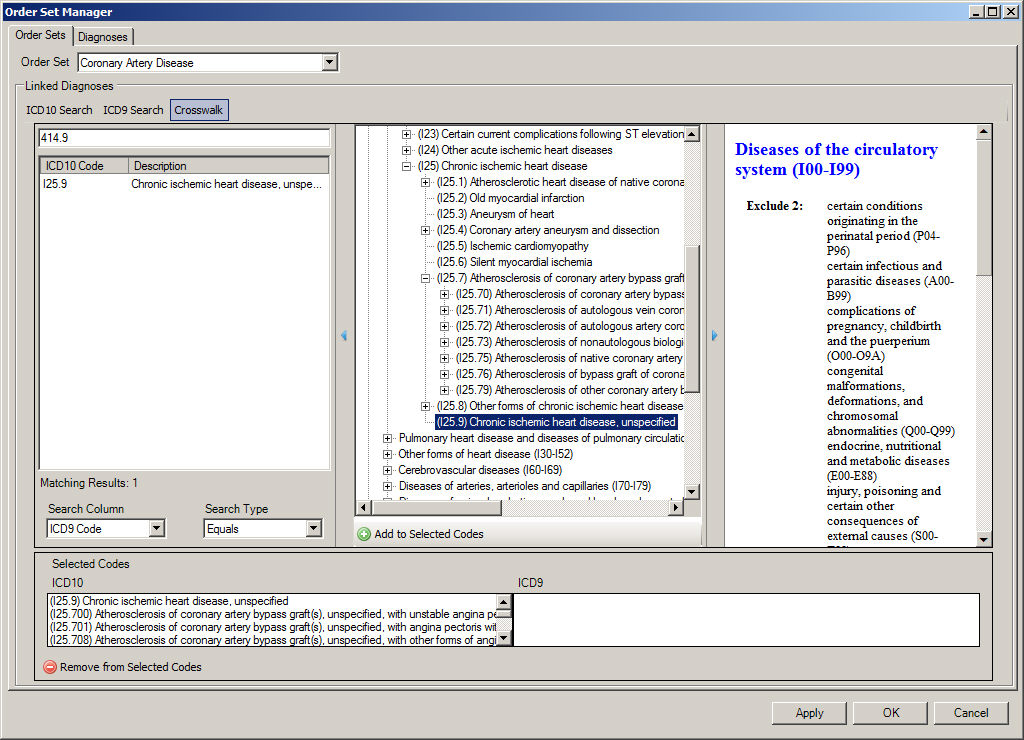
In the Order Set field of the Order Set Manager
dialog, select the Order Set you
are adding.
In the Linked Diagnoses section you can perform
an ICD10 Search, an ICD9
Search, as well as utilize the Crosswalk
functionality which allows you enter an ICD9 code and then the system
will return the applicable ICD10 code(s) that match that initial ICD9
code.
Once the applicable code or codes have been located, highlight that
code and then click the Add to Selected
Codes button. The code, or codes, will then appear in the Selected
Codes area under the applicable column. Codes can be removed if needed,
by highlighting the code in the Selected Codes area, and then clicking
the Remove from Selected Codes
button.
Once all of the applicable diagnosis codes have
been selected, click the Apply
button, and then click the OK
button.
In the Order Set Template dialog, click the Save button.
Click the Close button in the Order Set List dialog when finished.
Click Edit >
System Tables > Conditions > Diagnoses.
Search for and highlight
the diagnosis, and then click the Properties
button.
Click the Manage
Order Set button.

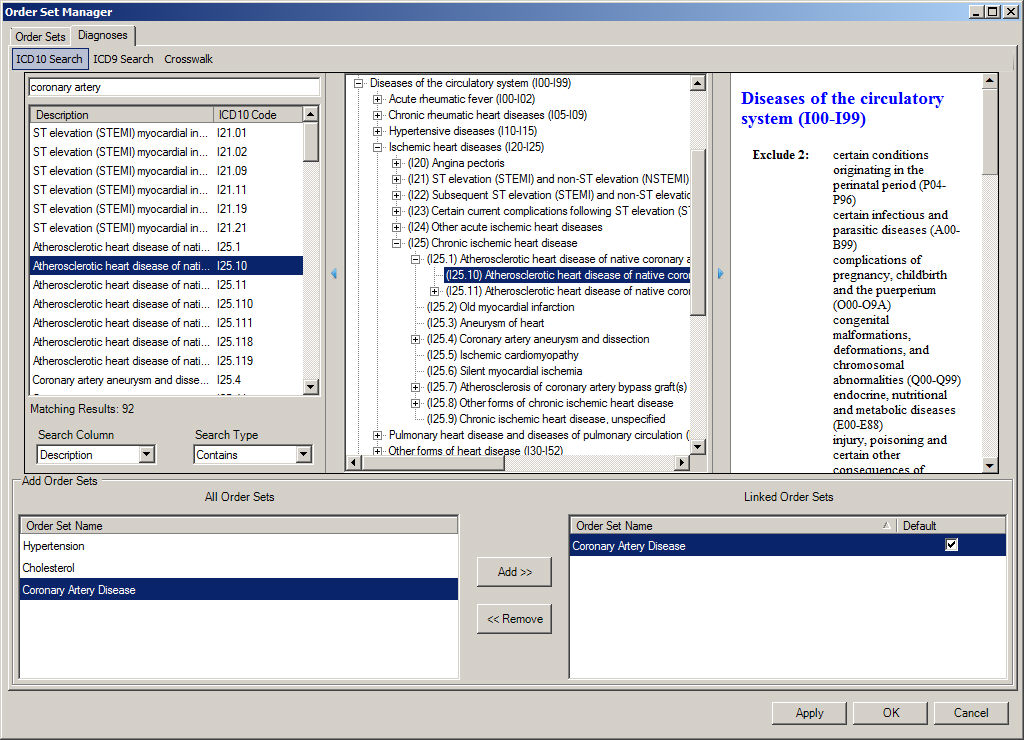
In Diagnoses tab of the Order Set Manager dialog
you can perform an ICD10 Search,
an ICD9 Search, as well as utilize
the Crosswalk functionality which
allows you enter an ICD9 code and then the system will return the applicable
ICD10 code(s) that match that initial ICD9 code.
Once the applicable code has been located, highlight that code, and
to add an Order Set to this diagnosis, highlight the applicable Order Sets in the All Order Sets column,
and then click the Add>>
button. To remove a linked diagnosis or set of diagnoses, highlight the
applicable diagnoses in the Linked Diagnoses column, and then click the
<<Remove button.
Check the Default
box next to the applicable order set.
When finished, click the Apply
button, and then click the OK
button.
In the Conditions Properties button, click the
OK button.
Click the Close button in the Conditions Search dialog when finished.
Select the Diagnosis
in a note
Leave the Use
Order Set box checked, and select the Order Set, if needed.
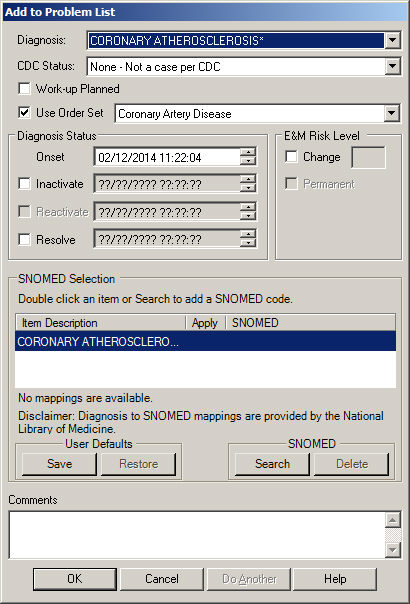
Click OK
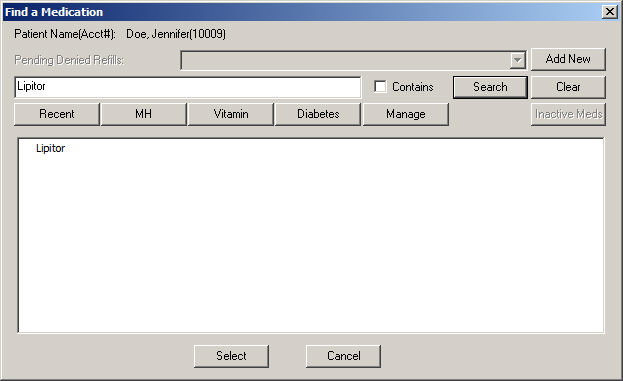
NOTE: ChartMaker will automatically open the Prescribe Medication window
if there is a configured medication. Highlight the medication and click
Select to complete the prescribe
process.
Once you complete the prescribe process, it adds
the medication to your note, along with the tests and images that you
ordered.

NOTE: You must have a Procedure checklist in your template in order
to see the order set items appear. You must have the Misc Note field in
order for a referral to appear.
Click Note >
Send Orders
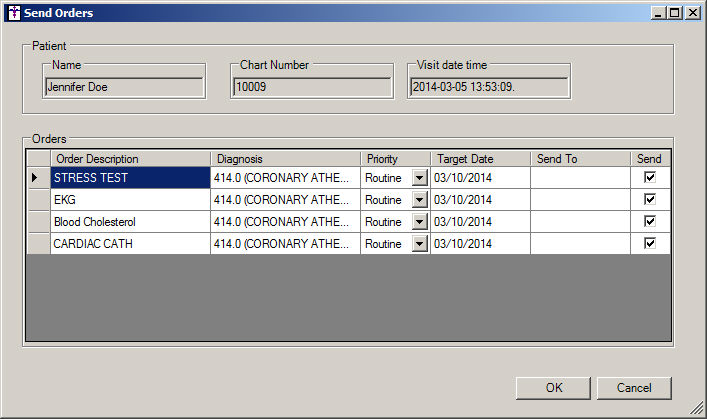
Check the box under Send
for the orders you want to send
Click OK
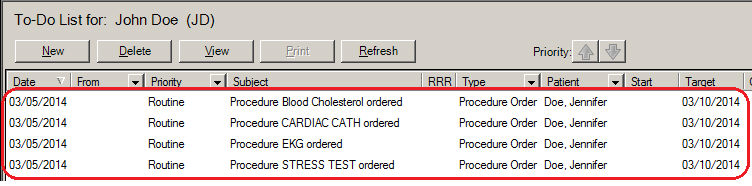
NOTE: They
will now show on your Face Sheet as Pending
If you close out of the chart, you will also notice Reminders on your
To Do List:
Open the patient’s chart
NOTE: You
do not have to open the original note; all you have to do is be in the
patient’s chart.
Click the Order
Status button.
In the Pending
and Completed order section select the applicable orders you want to update,
and then click the appropriate status option (Pending,
Completed, Reviewed,
Completed with Image, or Reviewed with Image).
In the Reviewed orders processed for this note
section select the applicable procedure, and then click the appropriate
status (Reviewed or Reviewed
with Image).
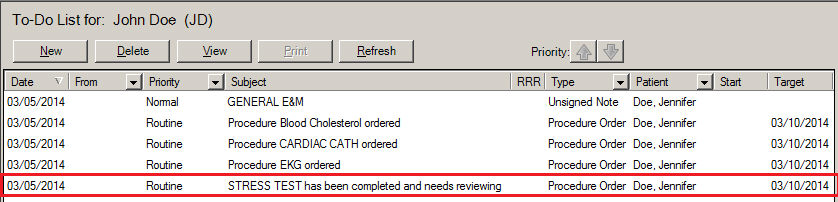
Save or close out of the chart. You will notice
it saved those changes and now the reminder on your To-Do List reflects
the changes.
Open the patient’s chart.
NOTE: You
do not have to open the original note; all you have to do is be in the
patient’s chart.
Right-click the procedure in the Face Sheet.
Select Review
In House Order.
NOTE: This method can only be used if the procedure is designated as
an In House procedure in System Tables.
Select the Order
Status at the bottom. The
options for the results will become available.
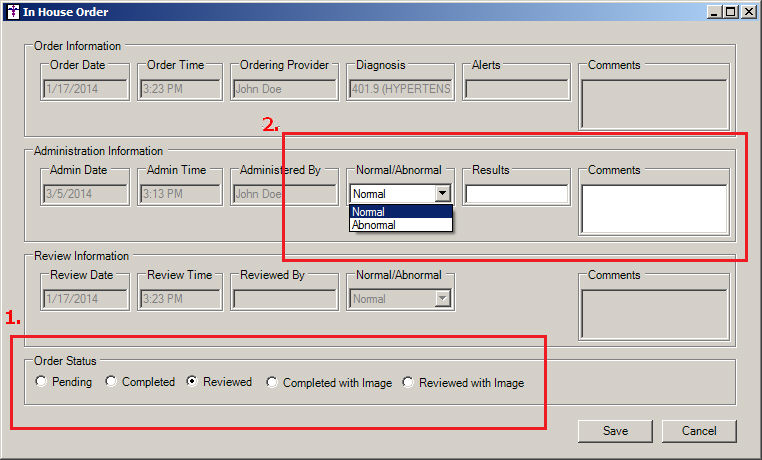
Click Save.
NOTE: Once the status is changed to “Reviewed”, the reminder is removed
from your To Do List and the Face Sheet.
You will receive an auto-generated note if you
Reviewed an In-house Order.
NOTE: If it is not an In-House Order and you use the drop-downs at
the top of the note, no auto-generated note is created.
Right-click the item from the Face Sheet.
Choose Queued
for Printing.
Right-click and choose Print
Procedures & Prescriptions.
Click OK.

NOTE: It will print using the same layout as your prescriptions.
Select the item in your note and send orders so
it is showing on your Face Sheet.
NOTE: The item you are ordering needs to be configured correctly. Perform
the steps in To configure a test, image,
etc. first.
Right-click the item from the Face Sheet.
Right-click and choose Print
Procedures & Prescriptions.
Click OK.
NOTE: It will print using the same layout as your prescriptions.