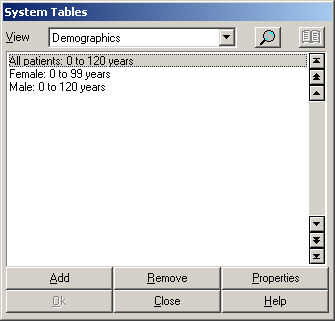
Click Edit >
System Tables.
In the View field of the System Tables dialog,
select Demographics.
Highlight All
patients: 1 to 120years, and then click the Properties
button.
Click the Form
Templates tab.
In the Form Templates tab, click the Add
button.
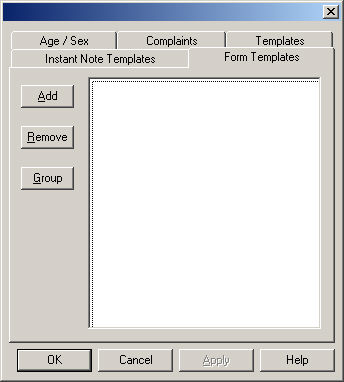
In the Templates dialog, search for the template
you want to add. Once the desired template has been located, highlight
it and then click the OK button.
In the Form Template tab, highlight the selected
Template, and then click the Group button.

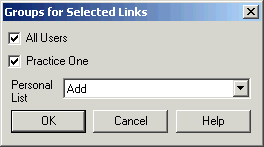
In the Groups for Selected Links dialog, check
the All Users option along with
any additional Practices you want
this form to be available for, and then click the OK
button.
Repeat steps 5 - 8 to add any additional templates.
When
finished adding templates, click the OK
button in the Form Templates tab.
In the System Tables dialog, click the Close button.