You must run the upgrade on your application server and must be logged
into the server as an administrator. Once you are logged into the application
server as an administrator use the following steps to upgrade the ChartMaker
Medical Suite.
Log into Practice Manager or Clinical.
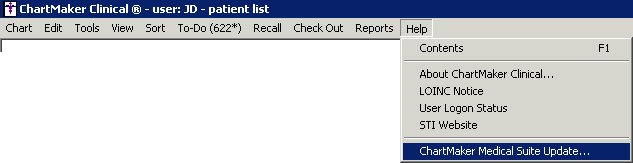
After you have logged in, click Help
> ChartMaker Medical Suite Update.
In the URL Entry
section of the ChartMaker Medical Suite Update dialog, enter the upgrade
URL (given by Customer Support).
You then have the options to configure the Download
Scheduling options and/or the Automated
Upgrade options.
In the Download
Scheduling section you have the option to download the upgrade
now (Start download now), or Schedule download to start at a configured
date and time.
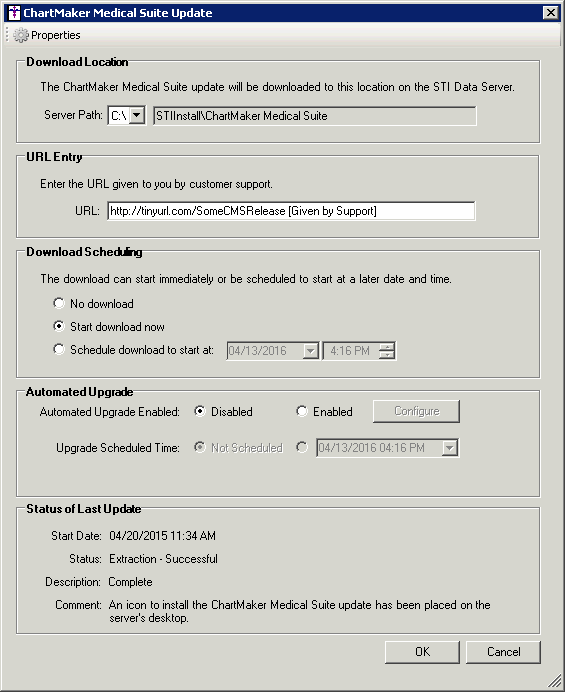
In the Automated
Upgrade section, you have the ability to enable an automated install
of the upgrade, and schedule a date and time for the automated upgrade.
If you DO NOT want to use the
automated feature, you can skip this section and go to step 12.
If you are using the automated feature, in the Automated
Upgrade Enabled field, select Enabled.
NOTE: The server will automatically restart at the end of the upgrade
when using the automatic upgrade option.
In the Upgrade
Scheduled Time field, click the radio button next to the Date/Time
drop-down, and configure the Date and Time you want the upgrade installation
to start.
NOTE: If the Update Install Package needs to be downloaded, or is in
the process of being downloaded, then the Upgrade
Scheduled Time must be set at least 24 hours into the future if
the Start Download now option
was selected in the Download Scheduling section (Step 4 above); or, at
least 24 hours later than the date and time configured in the Schedule
download to start at field if scheduling the download, to ensure
successful download of the Update Install Package.

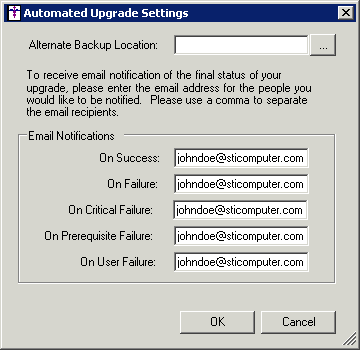
Click the Configure
button to access the Automated Upgrade Settings dialog and configure the
upgrade options and email notifications to be used for the automated upgrade.
In the Alternate
Backup Location field you can enter or browse to a specific location
for the backup if you do not want to use the default backup location.
If this field is left blank, the system will use the default backup location.
The Email Notifications
section allows you to configure email addresses to notify various individuals
about successes and failures of the update process:
When finished configuring the Automated Upgrade
Settings, click the OK button
to activate the changes. If you click the Cancel
button, or close out of this screen without clicking OK, the changes will
be discarded and the previous setting will be kept.
After the Automated Upgrade settings have been
configured as desired, click the OK
button. The system will then download and install the upgrade as configured
in the Download Scheduling and Automated Upgrade sections. The system
will generate any email messages regarding the upgrade process as configured
in the Automated Upgrade Settings
dialog.
If you are choosing not
to use the Automated Upgrade, then after the URL
has been entered and the Download Scheduling
options have selected, click the OK
button.
The ChartMaker Medical Suite Update Status dialog
will appear outlining the download status. Click the Close
button to run the download in the background.
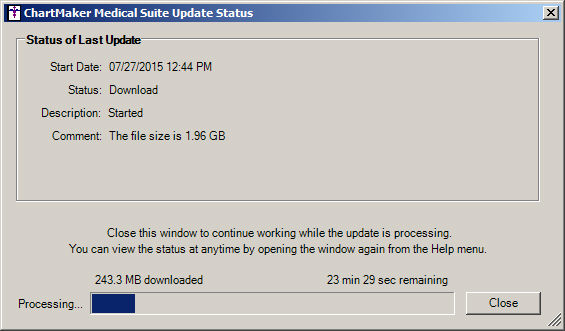
After
the download is complete, click the Close
button.

When the download is complete an Install ChartMaker
Medical Suite icon will appear on your desk top. When you are ready to
start the upgrade, double-click the Install
ChartMaker Medical Suite icon.

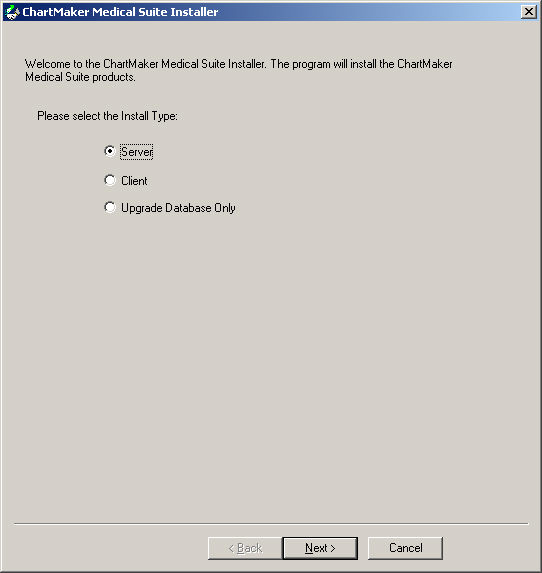
In the ChartMaker Medical Suite Installer dialog,
the Install Type will default to Server.
Click the Next button.
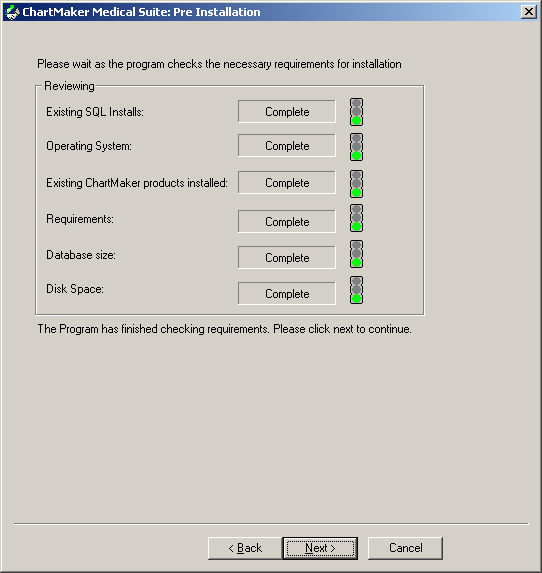
In the ChartMaker Medical Suite: Pre Installation
dialog, click the Next button.
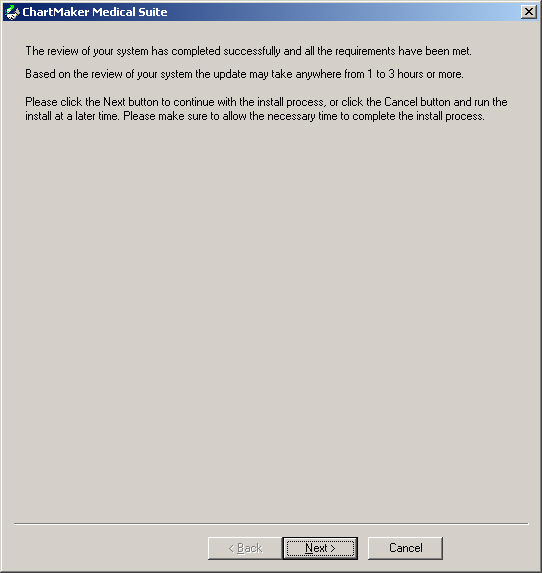
In the ChartMaker Medical Suite dialog, click
the Next button.
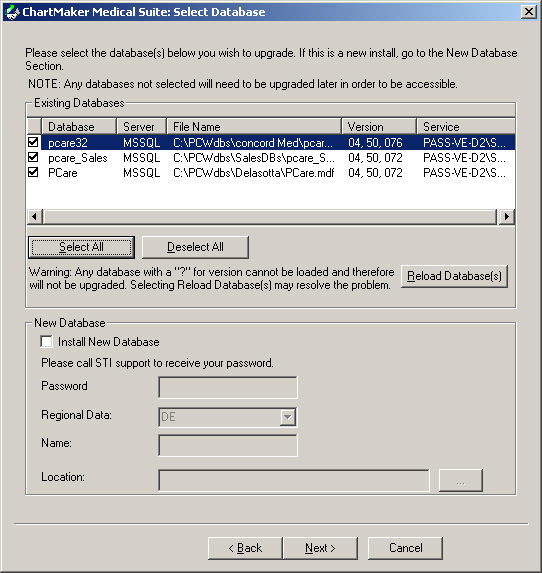
In the ChartMaker Medical Suite: Pre Installation
dialog, click the Select All button
if you have more than one database. If you have only one database it will
be checked. After the applicable databases have been selected, click the
Next button.
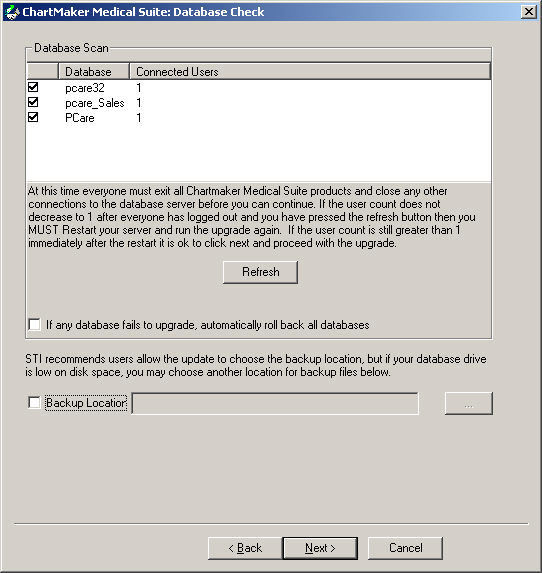
In the ChartMaker Medical Suite: Database Check
dialog, click the Next button.
NOTE: If the Connected Users
for each database does not equal 1
you will be asked to reboot. Reboot the server and start the upgrade again.
The upgrade will continue this time even if the Connected
Users for each database does not equal 1.
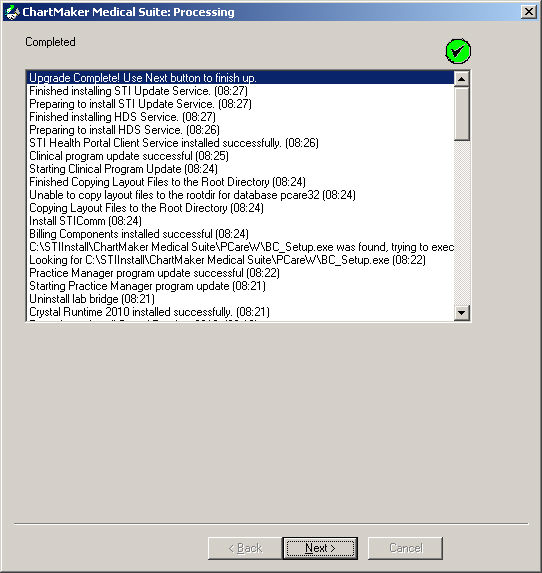
The upgrade will then begin. When the upgrade
completes successfully you will see the Green
circle with a Checkmark in the
upper right corner. Click the Next
button.
NOTE: If the upgrade does not complete successfully the circle will
be Red with an
X in it. In
this case click the Next button
and the upgrade will roll back to your original version. Please do not
attempt to run the upgrade again. Contact STI Software Support for assistance.
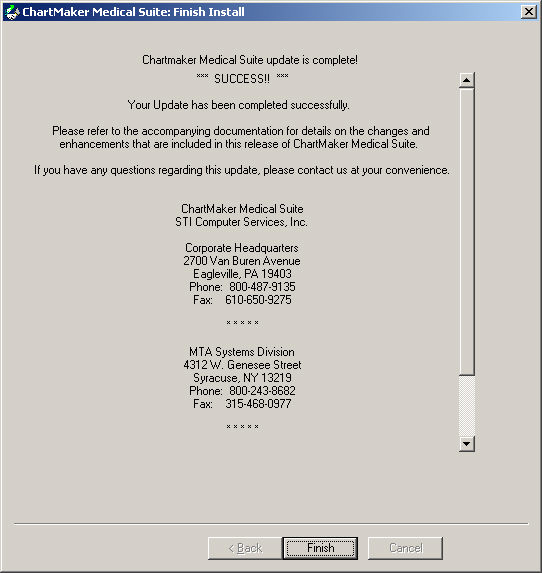
In the ChartMaker Medical Suite: Database Check
dialog, click the Finish button.
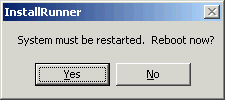
In the InstallRunner dialog, click the Yes
button to restart your server.
After the Restart you can log into the Clinical
and Practice Manager applications on each workstation. The first time
you log into each application a short client upgrade will run on the workstation.