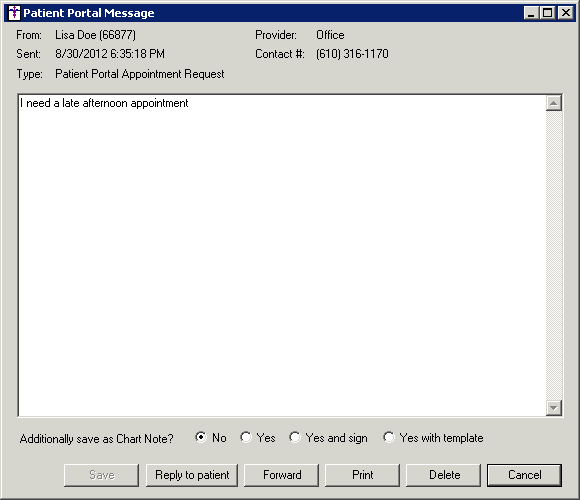
Double-click the PatientPortal
Message in the To-Do List.
In the Patient Portal Message dialog the contact
information and message details will be displayed.
You have the ability to save this message as a chart note via the Additionally
save as Chart Note option. These options (No,
Yes, & Yes
and Sign, Yes with template)
will vary depending upon the Charts
Privilege
you have. If you would like to do this, select the applicable option,
and then click the Save button. These options are also available when
replying to and forwarding a message.
You can also forward this message to another user by clicking the Forward button, print the message by
clicking the Print button, or
delete the message by clicking the Delete
button.
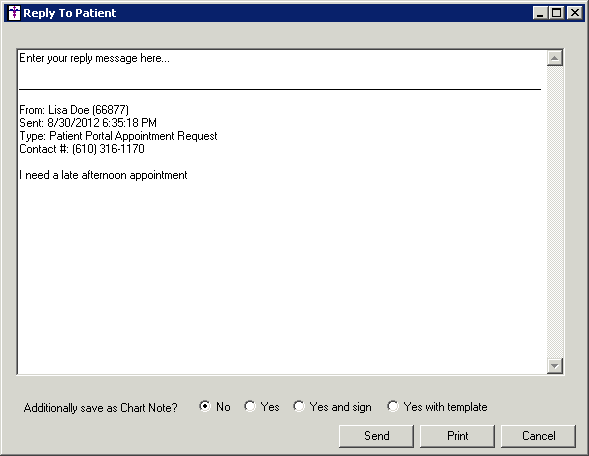
To reply to the message, click the Reply
to patient button.
In the Reply to Patient dialog, enter your Reply Message.
After you have entered the reply message, you
have the ability to save the message as a chart note via the Additionally
save as Chart Note option. These options (No,
Yes, & Yes
and Sign, Yes with template)
will vary depending upon the Charts
Privilege
you have.
Once the reply message and additional options
have been configured, click the Send
button to send the message to the patient; click the Print
button to print the message; or click the Cancel
button to exit the Reply to Patient dialog without sending.
If the Yes or Yes
and Sign option was selected, a new chart note will be created
for the patient. If the Yes with template
option was selected, the Select Complaints and Templates dialog
will appear allowing you to configure the applicable options for the template.