Each Shot Room user is required to be a User
in the Clinical
application.
Any Shot Room User who will be entering shot orders
in the Shot Room system needs to be Linked
to a Provider
in the Clinical application.
Each Shot Room patient is required to be a Patient
in ChartMaker®
Clinical. If a practice wants the Shot Room system to send charges to
ChartMaker®
Practice Manager, then each Patient’s
Insurance
needs to be configured in Clinical.
New
Locations
and Location Codes need to be added to the Clinical application. Each
office and branch office that will be administering shots will be required
to have a unique location code entered into Clinical.
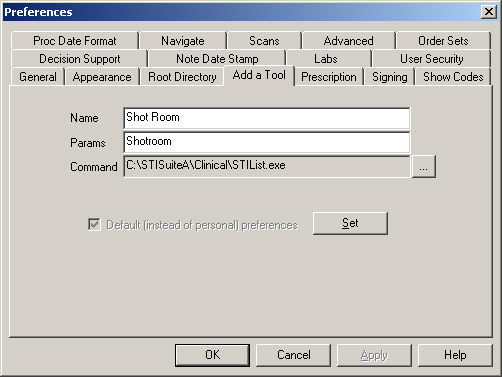
It is recommended that the Tools
directory be configured to launch the Shot Room application. This
allows you to access the Shot Room Automation dialog via the Clinical
application by clicking Tools > Shot
Room.
To do this click Edit > Preferences.
In the Preferences dialog, click the Add
a Tool tab. In the Name field enter Shot
Room. In the Params field enter Shotroom.
In the Command field, click the Browse
button, browse to the location of the STIList.exe
file, and then click the Open
button. Click the Set button,
and then click the OK button.